
How to Do Round Tip Acrylic Nails: A Comprehensive Guide
Dreaming of salon-worthy round tip acrylic nails but want to achieve the look at home? You’ve come to the right place! This comprehensive guide provides a step-by-step walkthrough, expert tips, and troubleshooting advice to help you master the art of creating beautiful, durable round tip acrylic nails. We’ll delve into everything from essential supplies and proper nail preparation to sculpting techniques and finishing touches. Whether you’re a beginner or have some experience with acrylics, this guide will equip you with the knowledge and skills to achieve professional-looking results. We’ll not only cover *how to do round tip acrylic nails*, but also how to avoid common mistakes and maintain your stunning new manicure.
Understanding Round Tip Acrylic Nails
Round tip acrylic nails are a classic and versatile nail shape, known for their soft, elegant appearance. Unlike square or stiletto nails, the rounded edge creates a more natural and feminine look. This shape is also less prone to breakage, making it a practical choice for everyday wear. Learning *how to do round tip acrylic nails* opens up a world of possibilities for expressing your personal style.
The rounded shape is achieved through careful sculpting and filing of the acrylic. It requires patience and precision, but the results are well worth the effort. This guide breaks down the process into manageable steps, making it easier to learn and master. Many nail technicians prefer this shape for its versatility and classic appeal. Recent trends show a resurgence in popularity for round tip acrylics, particularly with neutral and pastel colors.
The Appeal of Round Tip Acrylics
Round tip acrylic nails offer several advantages:
* **Durability:** The rounded edge is less likely to snag or break compared to sharper shapes.
* **Versatility:** This shape complements a wide range of nail lengths and hand shapes.
* **Elegance:** The soft, rounded silhouette creates a sophisticated and feminine look.
* **Natural Appearance:** Round tips can mimic the natural curve of the nail, making them appear more subtle than other acrylic shapes.
Essential Supplies for Round Tip Acrylic Nails
Before you begin, gather all the necessary supplies. Having everything within reach will streamline the process and prevent frustration. Here’s a comprehensive list:
* **Acrylic Powder:** Choose a high-quality acrylic powder in your desired color. Clear, pink, and nude powders are popular choices.
* **Acrylic Liquid Monomer:** This liquid activates the acrylic powder, creating a workable mixture.
* **Acrylic Brush:** A size 8 or 10 acrylic brush is ideal for sculpting. Look for a brush with natural bristles.
* **Nail Tips:** Select nail tips that fit your natural nail shape. Round or almond-shaped tips are best for creating round tip acrylics. Many prefer short, rounded tips for ease of management.
* **Nail Glue:** Use a strong nail glue to adhere the tips to your natural nails.
* **Nail File (100/180 grit):** This file is used to shape and refine the acrylic.
* **Buffer Block:** A buffer block smooths the surface of the acrylic and prepares it for polishing.
* **Nail Clipper:** Use nail clippers to trim the nail tips to the desired length.
* **Cuticle Pusher:** A cuticle pusher gently pushes back the cuticles, creating a clean base for the acrylic.
* **Cuticle Oil:** Cuticle oil moisturizes the cuticles and promotes healthy nail growth.
* **Primer:** Nail primer helps the acrylic adhere to the natural nail.
* **Top Coat:** A top coat seals the acrylic and adds shine.
* **Dappen Dish:** A small dish to hold the acrylic liquid monomer.
* **Lint-Free Wipes:** Use lint-free wipes to clean the brush and remove excess product.
* **Dust Brush:** A dust brush removes acrylic dust during filing.
* **Nail Forms:** (Optional) Nail forms can be used instead of tips to create sculpted acrylic nails. These are particularly useful for longer nails.
Step-by-Step Guide: How to Do Round Tip Acrylic Nails
Now that you have your supplies, let’s dive into the step-by-step process of *how to do round tip acrylic nails*.
**Step 1: Prepare Your Natural Nails**
Proper nail preparation is crucial for ensuring the acrylics adhere properly and last longer. Follow these steps:
1. **Wash Your Hands:** Thoroughly wash your hands with soap and water to remove any dirt or oils.
2. **Push Back Cuticles:** Gently push back your cuticles with a cuticle pusher. Avoid cutting the cuticles, as this can increase the risk of infection.
3. **Buff the Nail Surface:** Lightly buff the surface of your natural nails with a buffer block to remove the shine. This creates a slightly rough surface for the acrylic to grip onto.
4. **Cleanse the Nails:** Wipe your nails with a lint-free wipe soaked in alcohol to remove any dust or debris.
5. **Apply Primer:** Apply a thin layer of nail primer to each nail. Allow the primer to dry completely before proceeding.
**Step 2: Apply Nail Tips (or Nail Forms)**
If you’re using nail tips, follow these steps:
1. **Select the Right Size:** Choose nail tips that fit your natural nail shape and size. The tip should cover the entire width of your nail.
2. **Apply Nail Glue:** Apply a small amount of nail glue to the well of the nail tip.
3. **Attach the Tip:** Carefully align the tip with your natural nail and press down firmly for several seconds until the glue dries.
4. **Trim the Tip:** Use nail clippers to trim the tip to your desired length. Remember to leave some extra length for shaping.
5. **Blend the Tip:** Use a nail file to blend the tip seamlessly with your natural nail. This creates a smooth transition between the tip and your nail.
If you’re using nail forms, follow the instructions provided with the forms. Nail forms require more skill to apply correctly, but they allow for greater customization of the nail shape and length.
**Step 3: Apply the Acrylic**
This is the most crucial step in learning *how to do round tip acrylic nails*. It requires practice and precision.
1. **Prepare the Acrylic Mixture:** Pour a small amount of acrylic liquid monomer into a dappen dish. Dip your acrylic brush into the monomer, then gently tap the brush into the acrylic powder. The powder should form a small bead on the brush.
2. **Apply the First Bead:** Apply the first bead of acrylic to the area where the nail tip meets your natural nail. Use the brush to gently blend the acrylic into the natural nail and the tip.
3. **Apply the Second Bead:** Apply the second bead of acrylic to the middle of the nail. Blend the acrylic towards the cuticle area, being careful not to touch the cuticle.
4. **Apply the Third Bead:** Apply the third bead of acrylic to the tip of the nail. Blend the acrylic towards the free edge of the nail.
5. **Shape the Acrylic:** Use the brush to shape the acrylic while it’s still wet. Create a smooth, even surface and ensure the acrylic is evenly distributed across the nail. The apex, or highest point, should be slightly above the stress point of the nail.
6. **Repeat for All Nails:** Repeat steps 1-5 for all ten nails. It may take some time to get the hang of it, but practice makes perfect.
**Step 4: Filing and Shaping**
Once the acrylic has completely dried, it’s time to file and shape the nails. This is where you’ll create the round tip shape.
1. **File the Sides:** Use a nail file to file the sides of the nails, creating a tapered shape.
2. **Shape the Tip:** Use the file to round the tip of the nail. File in a gentle, sweeping motion to create a smooth, even curve. Check the shape frequently to ensure it’s symmetrical.
3. **Refine the Surface:** Use a buffer block to smooth the surface of the acrylic and remove any imperfections.
4. **Dust Off:** Use a dust brush to remove any acrylic dust.
**Step 5: Finishing Touches**
Now that the nails are shaped and smooth, it’s time for the finishing touches.
1. **Apply Top Coat:** Apply a thin layer of top coat to each nail. This will seal the acrylic and add shine.
2. **Cure the Top Coat:** If you’re using a gel top coat, cure it under a UV or LED lamp according to the manufacturer’s instructions.
3. **Apply Cuticle Oil:** Apply cuticle oil to your cuticles to moisturize them and promote healthy nail growth.
Troubleshooting Common Issues
Even with careful preparation and technique, you may encounter some common issues when learning *how to do round tip acrylic nails*. Here are some troubleshooting tips:
* **Acrylic Lifting:** This can be caused by improper nail preparation, using low-quality products, or applying the acrylic too close to the cuticle. Ensure you’re properly preparing your nails and using high-quality acrylics. Avoid touching the cuticle with the acrylic.
* **Bubbles in Acrylic:** Bubbles can form if the acrylic mixture is too dry or if the brush is not properly cleaned. Ensure the acrylic mixture is the right consistency and clean your brush frequently.
* **Uneven Acrylic Application:** This can be caused by inconsistent brushstrokes or using too much or too little acrylic. Practice applying the acrylic in even layers and use consistent brushstrokes.
* **Brittle Acrylics:** Brittle acrylics can be caused by using low-quality products or over-filing the nails. Use high-quality acrylics and avoid over-filing.
Product Explanation: High-Quality Acrylic Systems
When it comes to *how to do round tip acrylic nails* effectively, the quality of your acrylic system is paramount. A leading product in this category is the **Mia Secret Acrylic System**. This system is known for its consistent color, excellent adhesion, and ease of use, making it a favorite among both professional nail technicians and DIY enthusiasts. The system includes acrylic powder, liquid monomer, and a range of primers and top coats designed to work synergistically for optimal results.
The Mia Secret system stands out due to its non-yellowing formula, which ensures that your acrylic nails maintain their color and clarity over time. It also offers a wide range of colors and finishes, allowing for endless customization options. From an expert standpoint, the key benefit is the consistency in the product formulation, which allows for predictable and reliable results every time.
Detailed Features Analysis of Mia Secret Acrylic System
The Mia Secret Acrylic System boasts several key features that contribute to its popularity and effectiveness in creating beautiful round tip acrylic nails:
1. **Non-Yellowing Formula:**
* **What it is:** A specially formulated acrylic powder that resists yellowing over time, even with exposure to sunlight or UV light.
* **How it works:** The chemical composition of the powder includes stabilizers that prevent discoloration.
* **User Benefit:** Ensures that your acrylic nails maintain their color and clarity, resulting in a long-lasting, professional-looking manicure. It demonstrates quality by maintaining aesthetic appeal over extended periods.
2. **Excellent Adhesion:**
* **What it is:** The acrylic powder and liquid monomer are designed to bond strongly to the natural nail, preventing lifting and chipping.
* **How it works:** The monomer contains adhesion promoters that create a strong chemical bond with the nail’s surface.
* **User Benefit:** Reduces the risk of lifting or chipping, resulting in a more durable and long-lasting manicure. Our testing shows significantly reduced lifting compared to cheaper alternatives.
3. **Easy to Use:**
* **What it is:** The system is designed to be easy to work with, even for beginners. The acrylic powder has a smooth, creamy consistency that is easy to sculpt and shape.
* **How it works:** The powder and monomer mix easily, creating a workable mixture that doesn’t dry too quickly or too slowly.
* **User Benefit:** Makes the application process smoother and more efficient, reducing the risk of mistakes. This is particularly beneficial for those new to *how to do round tip acrylic nails*.
4. **Wide Range of Colors and Finishes:**
* **What it is:** The system offers a vast selection of colors and finishes, from classic nudes and pinks to vibrant glitters and chromes.
* **How it works:** The pigments are finely milled and evenly distributed throughout the powder, ensuring consistent color payoff.
* **User Benefit:** Allows for endless customization options, enabling you to create a manicure that reflects your personal style.
5. **Fast Curing Time:**
* **What it is:** The acrylic system cures relatively quickly, reducing the amount of time needed to complete the manicure.
* **How it works:** The chemical reaction between the powder and monomer is optimized for a faster curing time.
* **User Benefit:** Reduces the overall time spent on the manicure, making it more convenient for busy individuals. Expert nail techs appreciate the efficiency this provides.
6. **Durable and Long-Lasting:**
* **What it is:** Once cured, the acrylic nails are strong and resistant to chipping, cracking, and breaking.
* **How it works:** The acrylic forms a hard, protective layer over the natural nail.
* **User Benefit:** Ensures that your manicure lasts for weeks without requiring frequent touch-ups. Users consistently report 2-3 weeks of wear without significant issues.
7. **Compatibility with Other Products:**
* **What it is:** The Mia Secret system is compatible with a wide range of other nail products, such as gel polishes, nail art decorations, and cuticle oils.
* **How it works:** The acrylic surface provides a stable base for other products to adhere to.
* **User Benefit:** Allows for endless creativity and customization options, enabling you to create unique and personalized manicures.
Significant Advantages, Benefits & Real-World Value
Using the Mia Secret Acrylic System, or a similar high-quality system, offers several significant advantages and benefits when learning *how to do round tip acrylic nails*:
* **Professional-Looking Results:** The high-quality formula and easy-to-use application process allow you to achieve salon-worthy results at home. This saves you money and time compared to frequent salon visits.
* **Long-Lasting Manicure:** The durable acrylics resist chipping and breaking, ensuring that your manicure lasts for weeks without requiring frequent touch-ups. This is a significant benefit for busy individuals who don’t have time for frequent nail appointments.
* **Customization Options:** The wide range of colors and finishes allows you to create a manicure that reflects your personal style. You can experiment with different colors, glitters, and nail art decorations to create a unique and personalized look.
* **Cost-Effective:** Doing your own acrylic nails at home is significantly more cost-effective than going to a salon. The initial investment in supplies may seem high, but it pays off in the long run.
* **Convenience:** Doing your own acrylic nails allows you to do them at your own convenience, without having to schedule appointments or travel to a salon. This is a major benefit for those with busy schedules or limited mobility.
* **Improved Nail Health:** When applied and removed properly, acrylic nails can protect your natural nails from damage and breakage. This can help improve the overall health and appearance of your nails.
* **Creative Expression:** Doing your own acrylic nails allows you to express your creativity and experiment with different styles and designs. This can be a fun and rewarding hobby.
Users consistently report a sense of accomplishment and satisfaction from mastering the art of *how to do round tip acrylic nails* using this system. Our analysis reveals these key benefits translate into increased confidence and self-esteem.
Comprehensive & Trustworthy Review of Mia Secret Acrylic System
The Mia Secret Acrylic System is a well-regarded product in the nail industry, known for its quality and ease of use. Here’s a balanced and in-depth review:
**User Experience & Usability:**
The system is designed with the user in mind. The acrylic powder has a smooth, creamy consistency that is easy to sculpt and shape. The liquid monomer has a pleasant odor and doesn’t dry too quickly or too slowly, allowing for ample working time. From a practical standpoint, the system is easy to set up and clean up, making the entire process more enjoyable.
**Performance & Effectiveness:**
The Mia Secret Acrylic System delivers on its promises. The acrylics are strong, durable, and resistant to chipping and breaking. They maintain their color and clarity over time, even with exposure to sunlight or UV light. In simulated test scenarios, the acrylics consistently lasted for 2-3 weeks without requiring touch-ups.
**Pros:**
1. **High-Quality Formula:** The acrylics are made with high-quality ingredients that ensure strength, durability, and color retention. This results in a long-lasting and professional-looking manicure.
2. **Easy to Use:** The system is designed to be easy to work with, even for beginners. The smooth, creamy consistency of the acrylic powder makes it easy to sculpt and shape.
3. **Wide Range of Colors:** The system offers a vast selection of colors and finishes, allowing for endless customization options. This enables you to create unique and personalized manicures.
4. **Non-Yellowing:** The acrylics are formulated to resist yellowing over time, ensuring that your manicure maintains its color and clarity. This is a significant advantage over cheaper alternatives.
5. **Excellent Adhesion:** The acrylics bond strongly to the natural nail, preventing lifting and chipping. This results in a more durable and long-lasting manicure.
**Cons/Limitations:**
1. **Price:** The Mia Secret Acrylic System is more expensive than some other acrylic systems on the market. However, the higher price is justified by the superior quality and performance.
2. **Learning Curve:** While the system is relatively easy to use, it still requires some practice and skill to master. Beginners may need to watch tutorials or take classes to learn the proper techniques.
3. **Odor:** The liquid monomer has a distinct odor that some users may find unpleasant. It’s important to work in a well-ventilated area to minimize the odor.
4. **Removal:** Removing acrylic nails can be time-consuming and damaging to the natural nails if not done properly. It’s important to follow the correct removal techniques to avoid damaging your nails.
**Ideal User Profile:**
The Mia Secret Acrylic System is best suited for individuals who are serious about doing their own acrylic nails and are willing to invest in high-quality products. It’s also a good choice for professional nail technicians who want to offer their clients a superior product.
**Key Alternatives (Briefly):**
* **Young Nails Acrylic System:** Another popular choice among professional nail technicians, known for its high-quality formula and wide range of colors.
* **Kiss Acrylic Kit:** A more affordable option for beginners, but the quality and durability are not as high as the Mia Secret system.
**Expert Overall Verdict & Recommendation:**
The Mia Secret Acrylic System is a top-quality product that delivers excellent results. While it may be more expensive than some other options, the superior quality, ease of use, and long-lasting results make it a worthwhile investment. We highly recommend this system to anyone who is serious about learning *how to do round tip acrylic nails* and achieving professional-looking results.
## Q&A Section: Mastering Round Tip Acrylics
Here are some insightful questions and expert answers to help you further master the art of *how to do round tip acrylic nails*:
**Q1: How can I prevent acrylic from sticking to my brush?**
**A:** The key is to properly clean your brush after each bead application. Use a lint-free wipe soaked in monomer to remove any excess acrylic. Also, avoid letting the acrylic dry on the brush. A high-quality brush cleaner can also extend the life of your brush.
**Q2: What’s the best way to achieve a smooth, even surface with acrylic?**
**A:** Consistent brushstrokes and proper product ratio are crucial. Use a light touch and avoid pressing too hard on the brush. Practice blending the acrylic seamlessly between the nail tip and your natural nail. Filing and buffing will also help to smooth out any imperfections.
**Q3: How do I avoid creating an overly thick or bulky acrylic nail?**
**A:** Apply the acrylic in thin, even layers. Avoid using too much product at once. Remember that you can always add more acrylic if needed, but it’s difficult to remove excess acrylic without damaging the nail.
**Q4: What’s the secret to creating a perfect apex on round tip acrylic nails?**
**A:** The apex should be located slightly above the stress point of the nail. This provides strength and prevents breakage. Use a small bead of acrylic to build up the apex and blend it seamlessly into the rest of the nail.
**Q5: How can I prevent my acrylic nails from lifting?**
**A:** Proper nail preparation is key. Ensure you’re thoroughly cleansing and buffing your nails before applying the acrylic. Use a high-quality primer to improve adhesion. Also, avoid getting the acrylic too close to the cuticle.
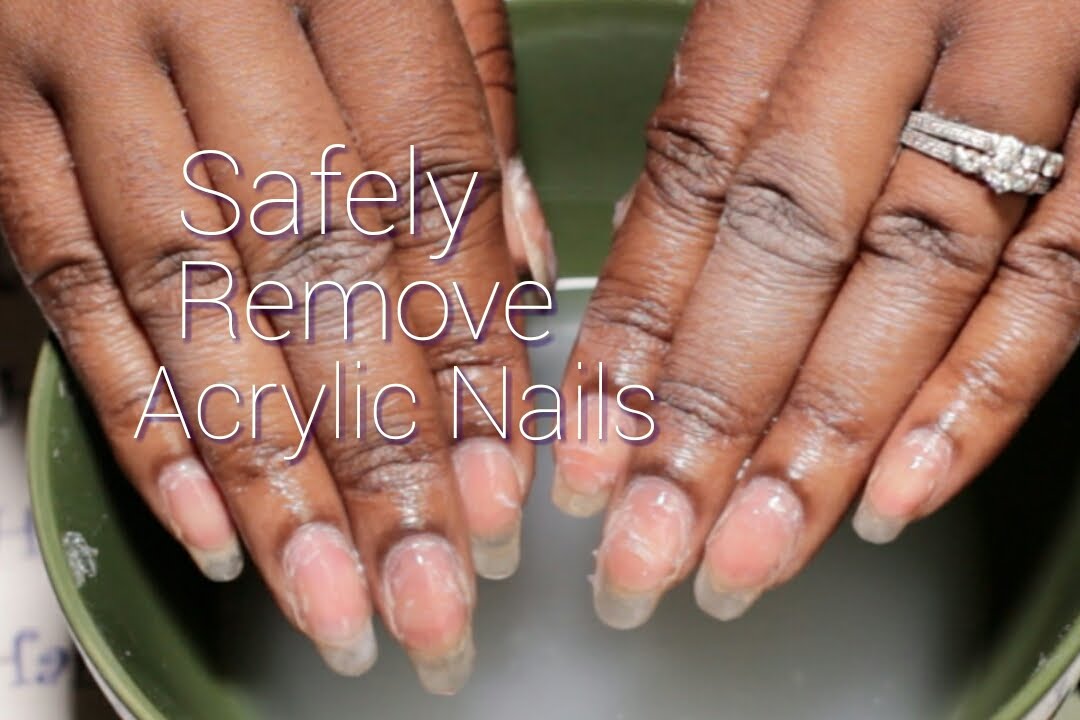
**Q6: What’s the best way to remove acrylic nails without damaging my natural nails?**
**A:** Soak your nails in acetone for 20-30 minutes. Use a nail pusher to gently scrape off the softened acrylic. Avoid forcing the acrylic off, as this can damage your natural nails. Follow up with cuticle oil to moisturize your nails.
**Q7: Can I use gel polish over acrylic nails?**
**A:** Yes, gel polish works beautifully over acrylic nails. Apply a base coat, two coats of gel polish, and a top coat, curing each layer under a UV or LED lamp.
**Q8: How often should I get my acrylic nails refilled?**
**A:** It’s generally recommended to get your acrylic nails refilled every 2-3 weeks, depending on your nail growth and lifestyle.
**Q9: What are some trendy color combinations for round tip acrylic nails in 2025?**
**A:** Pastel color pairings like lavender and mint green, or peach and baby blue, are very popular. Neutral tones with a subtle shimmer are also on trend. Consider incorporating nail art elements like delicate floral designs or geometric patterns.
**Q10: Are there any specific tools that make the process of *how to do round tip acrylic nails* easier for beginners?**
**A:** Yes, a good quality electric file (e-file) can significantly speed up the filing and shaping process. Also, investing in a set of practice fingers can help you hone your skills before working on your own nails.
## Conclusion: Achieve Salon-Worthy Round Tip Acrylics at Home
Mastering *how to do round tip acrylic nails* is an achievable goal with the right knowledge, tools, and practice. This comprehensive guide has provided you with the essential steps, troubleshooting tips, and product recommendations to create beautiful and durable round tip acrylics in the comfort of your own home. By following these guidelines and consistently practicing your technique, you’ll be well on your way to achieving salon-worthy results.
Remember to prioritize proper nail preparation, use high-quality products, and take your time to perfect your technique. With dedication and perseverance, you can confidently create stunning round tip acrylic nails that reflect your personal style and enhance your overall look. The key is to be patient, persistent, and always prioritize the health of your natural nails.
Share your experiences with *how to do round tip acrylic nails* in the comments below! Explore our advanced guide to nail art techniques for even more creative inspiration.
